

The Charm of a Curated Corner
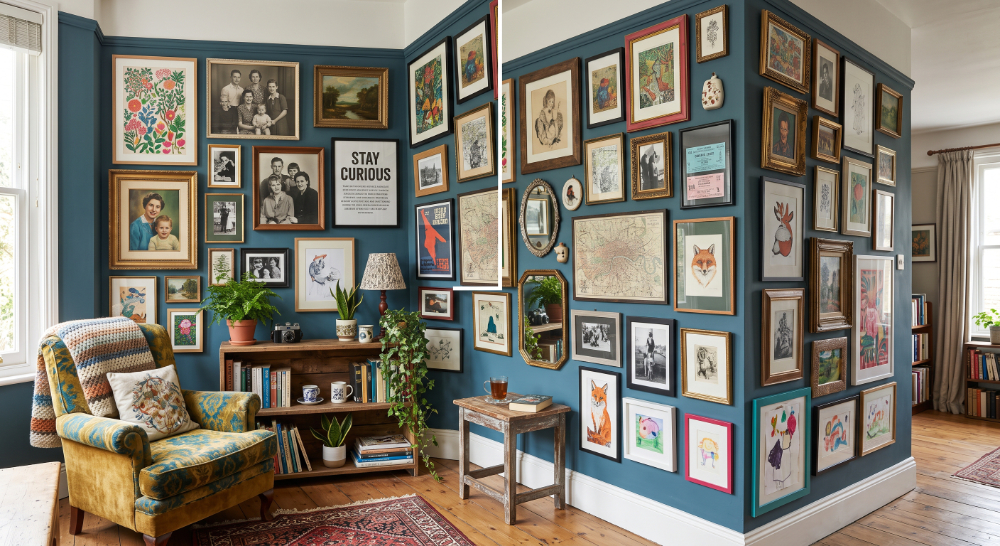
There is a unique magic in an eclectic home—one that feels thoughtfully gathered over time rather than purchased straight out of a showroom catalogue. One of the best places to cultivate this curated charm is an awkward room corner, transformed into a continuous, wrap-around gallery wall using second-hand finds and original artwork.
Building a corner gallery wall with thrifted frames and mixed art mediums isn’t just budget-friendly; it’s a creative way to give pre-loved objects a second life while showcasing your personal taste.

1. Sourcing Second-Hand & Thrifted Frames
The beauty of an eclectic wall lies in its diversity. When scouring charity shops, flea markets, antique fairs, or car boot sales, look beyond the art inside the frame and focus on the frame’s structural potential:
-
Vary the Profiles: Seek out heavy ornate gesso frames, simple turned wood mouldings, thin vintage brass frames, and convex oval profiles.
-
Embrace Flaws: Aged patina, gentle paint chipping, and weathered wood add authentic historical texture to your display.
-
Focus on Frame Backings: Check if the frame uses standard tabs or nails so you can easily replace older print inserts with new original artwork or fine art paper prints.
2. Mixing Artwork Mediums for Visual Depth
A common mistake when building a gallery wall is using identical art styles throughout. To create a rich, layered aesthetic across two intersecting walls, mix varied visual textures:
-
Thick Impasto & Canvas Art: Intersperse framed prints with unframed original acrylic or oil paintings featuring heavy palette knife work. The three-dimensional surface catches ambient corner light naturally.
-
Watercolour Washes & Ink Studies: Soft watercolour studies and detailed pen-and-ink sketches act as visual “breathing space” alongside heavier, darker oil paintings.
-
3D Artefacts & Small Objects: Break up rectangular frames by tucking small wall-mounted brass sconces, vintage keys, or carved wooden ornaments into small corner gaps.
3. Step-by-Step Installation Guide
Step 01: Gather & Prep Your Collection
Lay all your thrifted frames and artwork flat on the floor in front of your chosen corner. Clean off dust, tighten loose hanging hardware, and pair each artwork piece with a suitable frame.
Step 02: Map the Wall with Paper Templates
Trace the outline of every frame onto brown kraft paper and cut them out. Using painter’s tape, arrange the paper templates across the corner crease. Ensure you leave a 2 to 3-inch gap directly at the inner crease line so frames don’t hit each other.
Step 03: Start with an Anchor Piece near the Corner
Begin hanging your real frames by placing your strongest focal piece—such as an original coastal landscape or wildlife painting—at eye level on one side of the corner, then build outwards and across the crease.
Step 04: Balance Weight and Colour Across Both Walls
Avoid grouping all heavy dark frames on one side. Alternate gold leaf, natural wood, and dark frames evenly across both walls so the corner feels balanced rather than lopsided.
Pro Tip for Heavy Thrifted Frames:
Older thrifted frames can be surprisingly heavy. Always replace rusted eye-screws with modern picture wire or D-rings, and use sturdy wall anchors for plaster wall installations.
Final Touches: Lighting & Living Elements
Since corners naturally catch fewer direct light rays, illuminate your newly built gallery wall with a warm plug-in picture light or angle a floor lamp nearby. Adding a tall indoor plant (like a fiddle-leaf fig or trailing ivy) near the base of the corner softens the transition between floor, furniture, and art.